Showing posts with label retrocomputing. Show all posts

Thursday, January 17, 2019

Load an run any Amstrad CPC game or other software

I start a load games manual series with my favourite 8 bit computer: my Amstrad CPC.


Disc

Type
Run"disc"
or
 |CPM
(if the floppy disk has another command do this command).

Tape

  1. I your CPC has any floppy disk unit type:
    |TAPE
  2. Press CTRL & INTRO (small) or type:
    RUN"
  3. Press INTRO, play in the cassette and then any key.

Cartridge

  1. Switch the computer off.
  2. Change the cartridge.
  3. Switch the computer on.
Never change the cartridge with the computer switched on.


Interest links or if you want to know more

Monday, December 03, 2018

How to make a CP/M plus boot disk that start some commands at beginning (i.e.: Mallard Basic)

Vamos a preparar una cara de un disco de 3'' en un Amstrad CPC6128 para que al teclear |CPM arranque el sistema operativo y el comando que deseemos.

Lets make a CP/M plus boot disk in a side of a an Amstrad CPC6128 3'' disk, the goal is type |CPM an starts the operating system and the commands that we want.

Format as SYSTEM

IMPORTANT: You must use numerical keyboard in DISCKIT3 assistant, other numeric keys won't work.
  1. Insert CP/M plus disk #1 (better a copy) and type:
    |CPM
  2. Run the software:
    DISCKIT3
  3. Select these options:
    Format > System Format
  4. Keep system disk in A: drive until system tracks are copied, then press a key.
  5. Select unit drive where is the disk to format (if we have more than one).
  6. Confirm than this is the right drive and desired format, then press a key.
  7. DISCKIT ask us if we want to format another disk, in this case we say NO.
  8. Eject all the floppies and exit from DISCKIT3.
  9. Return to CP/M prompt

Copy system to our new floppy disk

  1. Insert again the new floppy but now in A: drive.
  2. Insert system disk in B: drive or switch when system ask you if you have only one.
  3. Copy these files to the new floppy:
    PIP B:=A:C10CPM3.EMS
    PIP B:=A:KEYS.*
    PIP B:=A:SUBMIT.COM
    PIP B:=A:SETKEYS.*
    PIP B:=A:SET24X80.COM
    PIP B:=A:AMSDOS.COM
    PIP B:=A:PIP.COM
  4. Eject both floppies, restart CPC and we insert only the new one in A drive. Check if all runs ok with the command:
    |CPM

Copy Mallard Basic and some example BAS files

In my case I got the executable file of Mallard Basic del PCW with some BAS files, so I need to copy them (now I insert old floppy in B:)
PIP B:=A:BASIC.COM
PIP B:=A:*.BAS 


 Hacer que arranque Basic Mallard al iniciar CP/M 

  1. Exit from CP/M typing AMSDOS
  2. Type this lines from Locomotive Basic IN AMSDOS:
    10 OPENOUT "PROFILE.SUB"
    20 PRINT #9, "BASIC"
    30 CLOSEOUT
  3. Save for future uses and changes:
    SAVE "GENPROF.BAS"
    (remember, this is a Locomotive Basic AMSDOS software, don't try to open with Mallard Basic in CP/M).
  4. Type RUN.
  5. Type |CPM again to check that new floppy works ok.

REMEMBER: Type SYSTEM to exit from Mallard Basic.

The big problem is you can't activate floppy write protection or autorun doesn't work. :(

Monday, November 26, 2018

Plug a stereo output to a mono input, the "mono emulator"

I want to plug my 8 bit computers tape port (input) to my new stereo cassette player another stereo set as my smartphone, a mp3 player, my raspberry pi in order to play games.
The idea is simple, plug all ground/mass conection together and stereo right and left signal to mono one.
To connect the stereo source to a computer with a homemade port, i.e. ZX Spectrum +2A or Commodore 64's tape unit, I make a cable with two male connectors, one stéreo and another mono, like this:
But If I want to make an adapter to an Amstrad CPC6128 or MSX tape cable the connections will be the same but mono connector will be female.
If I want to record in tape I need to this cable two times.
Also I can make a specific adapter for new smartphones (CTIA connection) or for my raspberry. At this cases we change the male stereo connector for an 4 contacts jack where most external connection will not be connecter (MIC or Video signal), ground will be the next connection.
If you use a very old mobile (OMTP connection), ground and MIC are swapped.

Monday, March 26, 2018

Amstrad CPC Easi-amsword to HTML converter made with javascript, html and css

In 80's, early computers consumers use simple and primitive word proccesors like Easy-amsword, made in Basic, usually included as a gift when you buy an Amstrad CPC464.
Some users make several docs than only this software can read, so now you need an operative Amstrad CPC or an emulator to read them, there isn't a simple way to convert them to new formats... until now.
I make a simple software to convert these files to simple HTML, so you can edit with a new wordproccesor as LibreOffice.org writer or HTML editors like BlueGriffon.
 Easi-amsword to HTML (source code)

How to install and run

  1. Download from here.
  2. Uncompress this ZIP file in a folder.
  3. Open eamsword2html.en.html file in your favourite web browser.

How to use

To use this software follow these steps:
  1. Select an easi-amsword file.
  2. Click on Convert button.
  3. Click on Save as HTML code, Convert to HTML or See as HTML code.


This software can use original easi-amsword files or the unofficial fork that manages several special characters or some format as bold, italics, overwrite, etc...
This software is under GNU/GPL 2 license so you can get here the source code, you can change to fix to your needs.
I hope it is useful for you to recover your documents of that time stored in tapes and you can preserve them for the future.

Notice: this software may be buggy, if you detect a bug comment in issues section.

If you can't extract your easi-amsword docs from your tapes, look at this.Artículo original en castellano

Sunday, December 31, 2017

Loading games in your Amstrad CPC6128 (input tape port) from your PC audio output

Amstrad CPC is living a new golden age because retrocomputing is on fashion.
A lot of enthusiastic users are making a lot of high quality homebrew for this old computer, but you need make a lot of difficult operations or buy new gadgets to use this software in your real CPC.
Is there another alternatives to awkward people with the welder as me? Yes, you can plug the output in your PC sound cart to input tape port in your Amstrad CPC, a simple solution but it work... but I find some issues...

Hardware

  • Tape wire: just plug in the input tape port to the output of your PC sound cart (green port).
  • Jack extension: the wire usually aren't long enough to connect your Amstrad to your PC unless they are really close, you can but an jack extension to solve a problem (around 2€).

Software

If you use any GNU/linux distro you need these software:

Do it

After install audacious and playtzx on the PC and pluging both computers, we need do this:

In your Amstrad CPC

Type
|TAPE
RUN"
And press play and any key

In your PC

  • Convert the cdt or tzx file to a voc file
playtzx -voc mygame.cdt temporalfile.voc
  • Play the file with audacious
audacious -pqH temporalfile.voc

Issues and solutions

You need select the correct volume, I try with a low level and I'm increasing until more than 100%.
I need change the sound configuration in my Ubuntu and allow a level bigger than 100%

At least I needn't any mini amplifier as on other occasions.

In theory you can directly play the cdt with the command playtzx mygame.cdt without parameters but it doesn't work and I need convert file to voc and play it with audacious.
You might do this with other 8 bits computers like my ZX Spectrum +2 (I think it doesn't work in my Commodore 64), in these cases you need an audio cassette adaptor to plug the wire to the retro computer.


We also change the jack extension using a bluetooth speaker than includes output to headphones, if this gadged provides enough volume.
You can automatize with a bash script:
#!/bin/bash
playtzx -voc mijuego.cdt /tmp/temporal.voc
audacious -pqH /tmp/temporal.voc
rm /tmp/temporal.voc
Now we can enjoy the latest software releases for our Amstrad CPC :)
Artículo original en castellano

Friday, September 01, 2017

How to run CPCXFS under Debian or Ubuntu

CPCXFS is a DSK Amstrad CPC disk image editor for use with emulators, you can:
  • Create new DSK images.
  • List the contents of the DSK.
  • Add, rename or delete files in the DSK.
  • Etc.

Setup

Follow these steps in order to install it in your GNU/Linux distro:
  • Add the necessary packages to compile and install:
    sudo apt-get install termcap* build-essential
  • Download the lastest versión.
  • You can uncompress it with nautilus, mc or console with the command:
    unzip -x cpcxfs.zip
  • Compile it:
    cd src
    make -f makefile.lnx clean
    make -f makefile.lnx
  • Move the binary to /usr/local/bin to get available in any path
    sudo mv cpcxfs /usr/local/bin/

Use

You can use this software in the linux console, you can see all the possibilities with the command:
cpcxfs --help

You can see some help files into the zip:
  • cpcxfs.doc: text plain file, you can use your distro text editor.
  • cpcxfs.hlp: windows help file, you can use xchm to read it.
Some interesting examples of use:
ExamplesResult
cpcxfs disc.dsk -dShow the contents of the DSK
cpcxfs disc.dsk -sShow statistics and technical information about the DSK
cpcxfs disc.dsk -g fileExtract a file from the DSK
cpcxfs disc.dsk -p fileAdd a file from the DSK
cpcxfs disc.dsk -mg file*Extract the files from the DSK acording to the input mask
cpcxfs disc.dsk -mp file*Add the files from the DSK acording to the input mask
cpcxfs disc.dsk -hMore help
..
Artículo original en castellano

Wednesday, August 02, 2017

Install CPCtelera in Ubuntu

CPCtelera is a low-level C library that makes things much easier for who want to program software for Amstrad CPC. You can add various elements and compile the result directly into a DSK or CDT file, disk and tape CPC images respectively ready to run in a Emulator or burn in a physical medium to execute in a real Amstrad CPC.
CPCtelera

 Install it on Ubuntu 14.04 64 bits

  • Go to $HOME folder and download the latest version of CPCTelera source code, just type:
git clone https://github.com/lronaldo/cpctelera
  • Install all the libraries you need install it:
sudo apt-get install build-essential bison flex libboost1.55-dev libfreeimage-dev wget unzip wine
  • Start the instalation:
cd cpctelera
./setup.sh
If you need any other library the instalation tell you in the process.

Use

Read the CPCtelera Reference Manual there are also a lot of videos in youtube but most of them are on Spanish.
Artículo original en castellano

Monday, July 03, 2017

First Amstrad CPC emulators in GNU/Linux

Amstrad CPC are computers that I have a lot of affection since my first two computers were a CPC464 and a CPC6128, in fact the last one is still running and keeping 100% operative.

 CPC wiki

So I like to play my games of my teen in GNU/Linux and I start using CPCEMU emulator for it.
CPCEmu for DOS was the first CPC emulator I knew, it was great. GNU/Linux version was one of the best native emulator, install it is very simple:
  • Download lastest version for GNU/Linux.
  • Uncompress it in a folder.
  • Select the folder and type the commands cpc464, cpc664 or cpc6128 it depends of the model you want to run.
  • You needn't search the BIOS because BIOS distribution with emulators was allowed by Amstrad, but only provided it is only for that purpose. Therefore, CPCEMU already includes the BIOS.
  • You find some folder intro the instalation folder DISC/, ROM/, SNAP/, TAPE/, UTILITY/ to put on them disk images, ROMs, snapshots, single files and utilities.
All these files can be into a ZIP file that emulator show them like folders, this is useful to save a lot of space.
See the enclosed manual, very interesting.


Other native emulators for GNU/Linux are M.E.S.S., Arnold, CPC++ or cpc4x, but they are more complicated for compiling and installing and they don't have so much features and have less performance than CPCEMU.

I asked in Amstrad CPC forum, MiguelSky ask me than there is a version of arnoldCPC emulator that runs ok in older GNU/Linux distros.

You need download the old version for Windows (includes all the BIOS and necessary files) and add to it the new executable file for GNU/Linux.

But now there is a new version of Arnold WIP CPC Emulador.  that run better in lastest GNU/Linux distros.

Also, KaosOverride recomends me recompile Caprice emulator.


After some years he made a fork called CapriceRPI for raspberry pi with a fancy menu and a lot of improvements. This fork can also be compiled and runs on PC GNU/Linux.
Thank you both for the information.

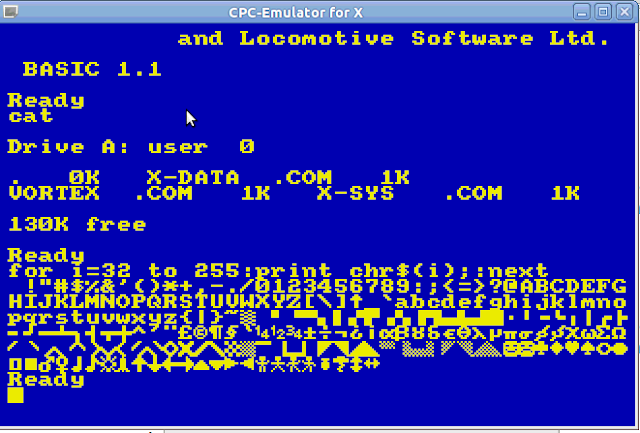
Another emulator I run with success is CPC emulator for X.


By the way, most of the Amstrad CPC emulators for Windows run ok in GNU/Linux using wine.

Original articles

Sunday, June 18, 2017

Amstrad PCW emulation in GNU/Linux

The possibility of running software Amstrad PCW in a GNU/Linux is not well known because there are usually no emulators available in the official repositories of most distributions, unlike in other platforms such as commodore , spectrum , ataris , etc...
 

But there is an emulator for Amstrad PCW called Joyce, that works very well and we can install doing in any GNU/Linux (including raspberry pi), just follow these instructions:

  1. Download lastest version for Unix.
  2. Uncompress this file in a folder, for example in /opt . You can rename the subfolder as pcw:
    cd /opt
    sudo tar -zxvf joyce-2.2.7.tar.gz
    mv joyce-2.2.7 pcw
  3. Compile the code (we'll need libxml2-dev pack):
    sudo apt-get install libxml2-dev
    sudo chmod +rw pcw
    cd pcw
    ./configure
    make
    sudo make install
  4. You also need an image of CP/M plus boot disk, copy it on $HOME/Joyce/Boot folder and rename as boot?.img where ? is a number from 0 to 9.
  5. You'll need a real PCW to use them legality (A friend presents me one), in any case you need search in another site or get from your own PCW with the necessary tools, I can't provide a link to these files.
  6. You can run the emulator with this command:
    xjoyce
Artículo original en castellano